REPRODUCTION OF GLOXINIA AND TIPS FOR PLANTING AND CARE OF FLOWER GROWERS
FLOWERING HOUSE WITH GLOXINIUM
Is it possible to admire blooming gloxinia all year round? Sure! Contrary to popular belief, that this is a purely summer flower, which has a rest period in winter, like a tuberous plant. Experienced florists will tell you more about this and not only..
Let their knowledge inspire you!
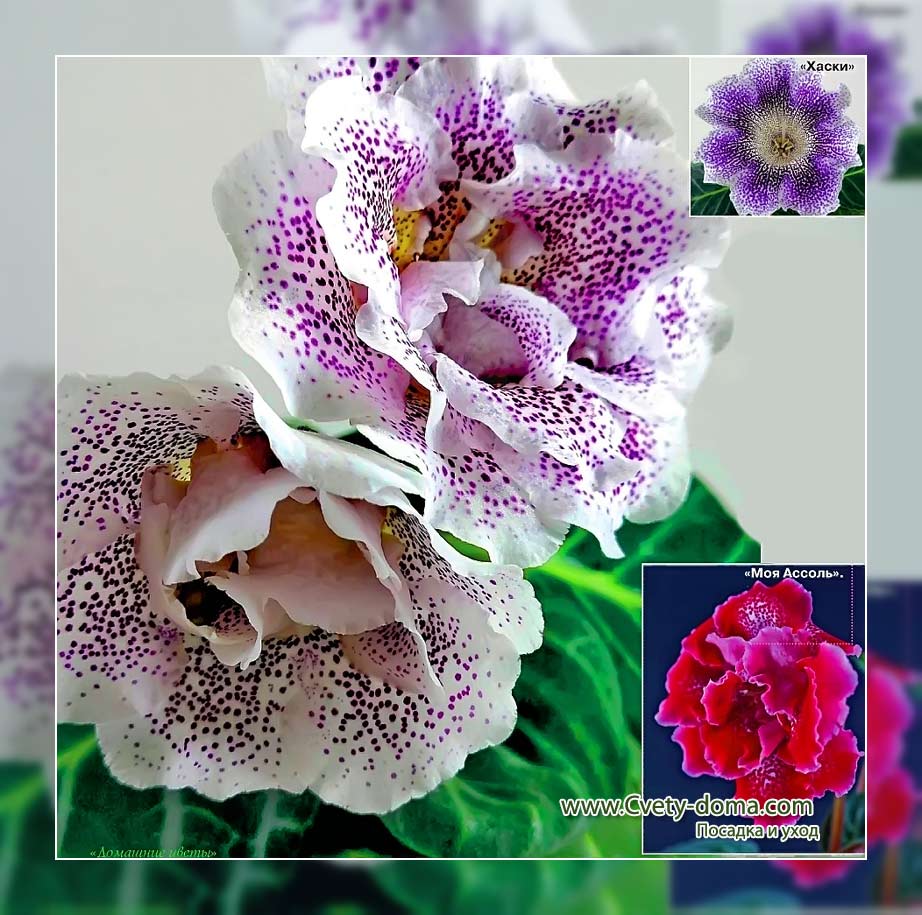
By seed propagation, pollinating different varieties artificially, available & new colors, and with the help of hybridization to breed your own unusual variety. I have such now 2. The first, rare aroma, named "Husky". Second, with natural flower shape and double petals, "My Assol".
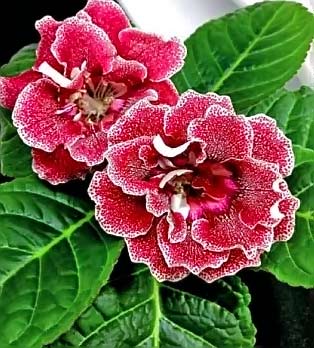
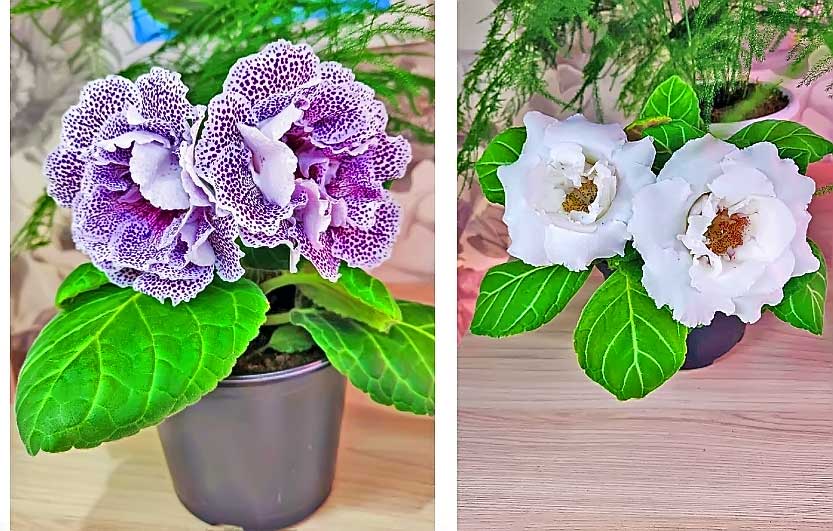
My collection began with the purple Brocada Gloxinia donated by my grandmother. Now I have more 70 varieties.
GLOXINIA COLORS IN QUEUE
At first, I sent the tuber to hibernation in the fall, and in the spring he planted it in a new soil and admired the flowering in summer. Then he became interested in other varieties and hybrids. Of which, as it turned out, - hundreds! Having exchanged leaves with flower growers, planted them in peat soil in June, and by September there were children. I immediately thought: and how they will grow and bloom in late autumn, when they need to sleep? Found information, that gloxinia need a lot of light. Put the kids on the shelves under the lamps, and in December they bloomed.
Growing on a rack gives you the opportunity to admire the flowering of gloxinia all year round. To do this, I send them on vacation in turn - through 7-9 months of growing season. The rest period lasts at least 2 months.
Gloxinia feel great on any window sills without additional lighting in spring and autumn. Only in the south they need to be shaded from the scorching sun.
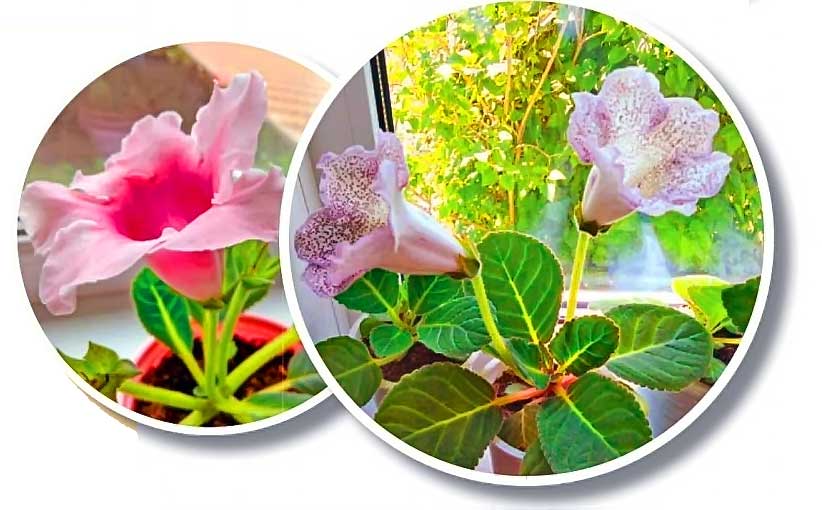
gloxinia (Photo) planting and care
GROUND AND FEEDING GLOXINIA
To grow gloxinia, I tried soil mixtures of different companies and brands, but not all fit. You need a light substrate, which is dominated by high moor peat, added vermiculite or perlite and complex fertilizer. The latter is enough on average for 2 months. And since the growing season for gloxinia is 7-9 months, then I additionally feed the plants: first 4 months - a complex with a high nitrogen content, after laying the buds - phosphorus and potassium. Mineral fertilizers alternate with organic.
WATERING
Gloxinia love to drink, however, they do not tolerate overflow. Feel great on the wick. Drought tolerant, but not overdrying. I water the plants with water on 2 degrees above room temperature and separated for at least a day.
© Author: Dmitry LOSEV, r. Vyshny Volochek, Tver region. Photo by the author
REPRODUCTION OF GLOXINIA – METHODS
Which flower is the easiest to propagate? Sure, gloxinia - collectors consider. Tuber, leaf cut, fragment of the letter, seeds…

REPRODUCTION OF GLOXINIA BY FLOWER!
PERSONAL EXPERIENCE
I cut the peduncle on the 4th day of flowering (sooner or later, but the bud must be open), shortening the petals to 2 cm from the receptacle and leave to dry for minutes 5. I put it in a plastic cup (100 r) with slightly damp light soil, I put it in a zip bag and put it in a bright place. I do not water. A month later, roots appear, and soon baby.
REPRODUCTION OF GLOXINIA
GLOXINIA BY SEEDS
I sow gloxinia seeds in a container with a lid (200 r) on light and damp flower soil, flattening it with a spoon, otherwise the seed will fail. For convenience, I pour the dusty seeds onto a sheet of paper., bent in half, and with a wooden toothpick I gently move them to the edge of the leaf, and then - on the ground.
Ideally, the distance between seeds should be 1 cm. I spray the crops lightly, I close the lid and put it in light, place without direct sun. When +20-23 city, seedlings appear on 7-10 day. I do not remove condensation, do not open before transplanting and do not water. When it seems, that the substrate is dry, be sure to check with your finger. And if you really need to moisturize, it is better to do this with a syringe - insert it into the ground and gently release the water.

AGAINST PESTS
I think, that preventive treatment of gloxinia with chemical preparations is not needed, as insects develop addiction to them. Better to use "Aktara" or "Fitoverm", when the enemy has already appeared. How to prevent this? for example, finding any suspicious speck on the sheet, wash the leaves under hot (how much the hand tolerates) water. Important, so that it does not hit the center of the tuber. Then I quarantine the plant, watching. General cleaning of the room: ammonia solution (1 st.l.. on 5 l of water) I wipe the shelves, window sills, batteries and my floors.
GLOXINIA – CULTIVATION AND REPRODUCTION
FROM OBSERVATIONS
Seeds of simple gloxinia can give a double flower and, on the contrary, Terry seeds - a simple "bell".
Flowers with different shades appear on one plant.
With age, the color of "bells" becomes more saturated.
WANT THAT GLOXINIA HAVE A LOT OF BUD?
- The duration of daylight hours must be at least 12 hours. In winter, I turn on the daylight lamps on 16 Watt.
- You need to feed gloxinia every 10 days, since March. I make a schedule for this. If I miss feeding days, then I never increase the fertilizer dose afterwards. Better to underfeed, than to overfeed. I usually reduce the dosage in 2 times, than recommended according to the instructions. I fertilize through 20 minutes after main watering, so as not to burn the delicate roots of the plant.
WITH. On a sunny window (with shading from direct rays) more buds are formed.
© Author: Irina AKULOVA, plant collector, r. Orenburg
REPRODUCTION AND CARE OF GLOXINIA IN THE HOME CONDITIONS – FLOWER TIPS AND REVIEWS
HOW TO REPLACE GLOXINIA
There are many varieties of gloxinia on sale now, but the most beautiful terry can only be found at collectors, fascinated by this plant. In connection with these, the question often arises: how to get new copies from the gloxinia you like?
SEEDING SEEDS
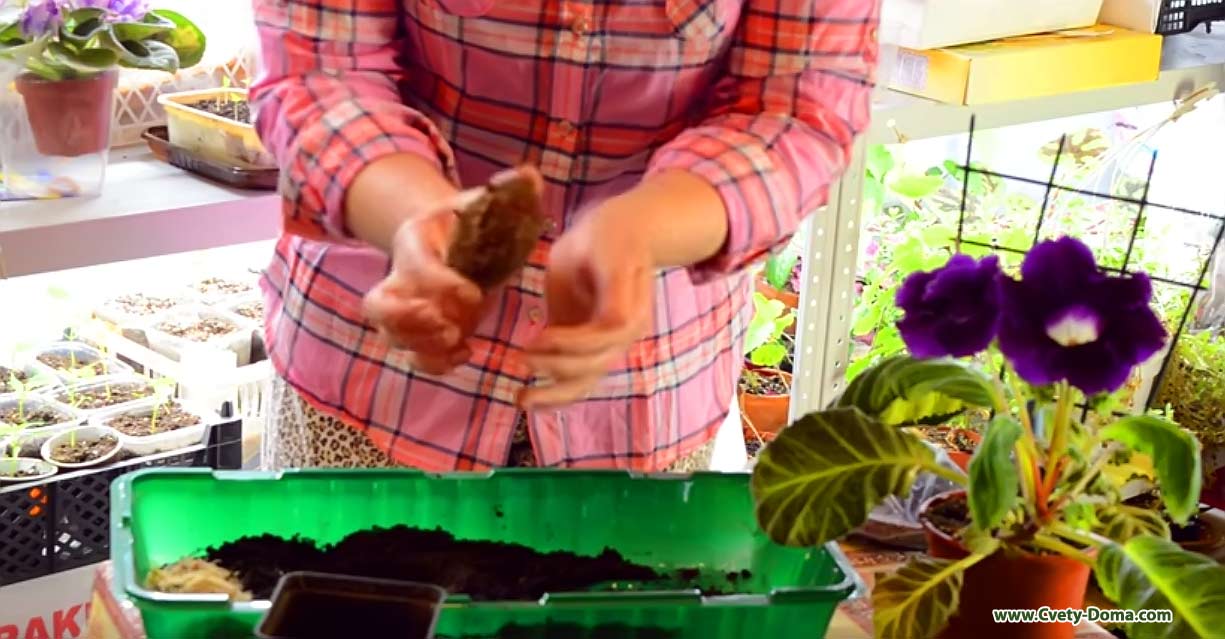
It is best to start sowing gloxinia seeds in January.. The soil substrate must be loose. You can make it from leafy earth and sand or peat., taken in equal shares. Place the prepared substrate in a shallow container..
Gloxinia seeds are very small. Therefore, before sowing, it is advisable to mix them with sand., so that they are evenly distributed over the soil surface. If there are few seeds (usually the bag contains no more 6-8 pieces), then you can put them on the soil substrate with tweezers. You don't need to plant seeds in the ground, just spray with water from a spray bottle. With this watering, drops of water will lightly press the seeds into the soil to a depth, necessary for their germination. But sometimes, using a spray bottle, you can knock down the seeds, breaking their uniform distribution. therefore, if possible, it is best not to spray crops, and put on top a small (1-1,5 cm) snow layer. When it melts, the water will nail the seeds to the ground.
From above, the container with the sown seeds will need to be covered with glass or transparent plastic wrap and placed in a bright, warm place, where the air temperature is kept at 23-25 °. As it dries, the soil must be moistened. This can also be done using a spray bottle or gently watering to the edge of the container..
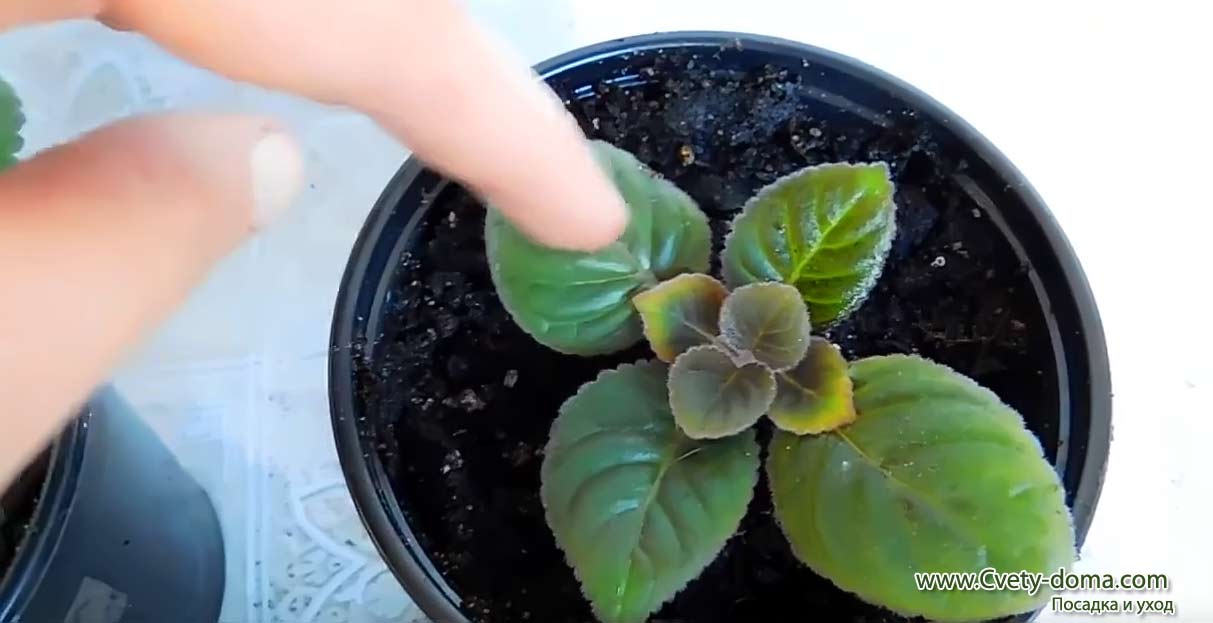
The first shoots of gloxinia appear at about 12-14 days. After the appearance of the first pair of true leaves, young plants are planted: first in small pots, then, when they grow up, – to slightly larger. The third time gloxinia can already be transplanted into permanent pots. After the first transplant, so that plants can more easily adapt to the dry air of the room, they can be lightly covered with plastic bags. When planting, it is important to observe, so that the ground does not cover the center of the outlet.
Young plants need a lot of light, but not direct, but absent-minded. But feeding is not needed at first., they can go to the detriment of future flowering.

Reproduction of gloxinia
DIVISION OF CLUBS
This method is suitable for the spring breeding of gloxinia, when the plants begin to emerge from the dormant period.
Gloxinia tubers need to be removed from the pot, spread out on peat, sand or sphagnum moss, put in warm (23-25°) light (but without direct sunlight) place and start regular watering.
After a while, young new shoots form on the tubers.. Now the tubers can be cut into pieces, so that each of them has one sprout. Places of cuts should be sprinkled with crushed coal for disinfection (some gardeners successfully use ground cinnamon for this purpose). Then the delenki are seated in separate pots with loose earth.. It is helpful to keep the gloxinia under a plastic bag for the first couple of weeks.: roots are formed faster, and the sprouts will not suffer from dry air.
GLOXINIUM BY SHEETS
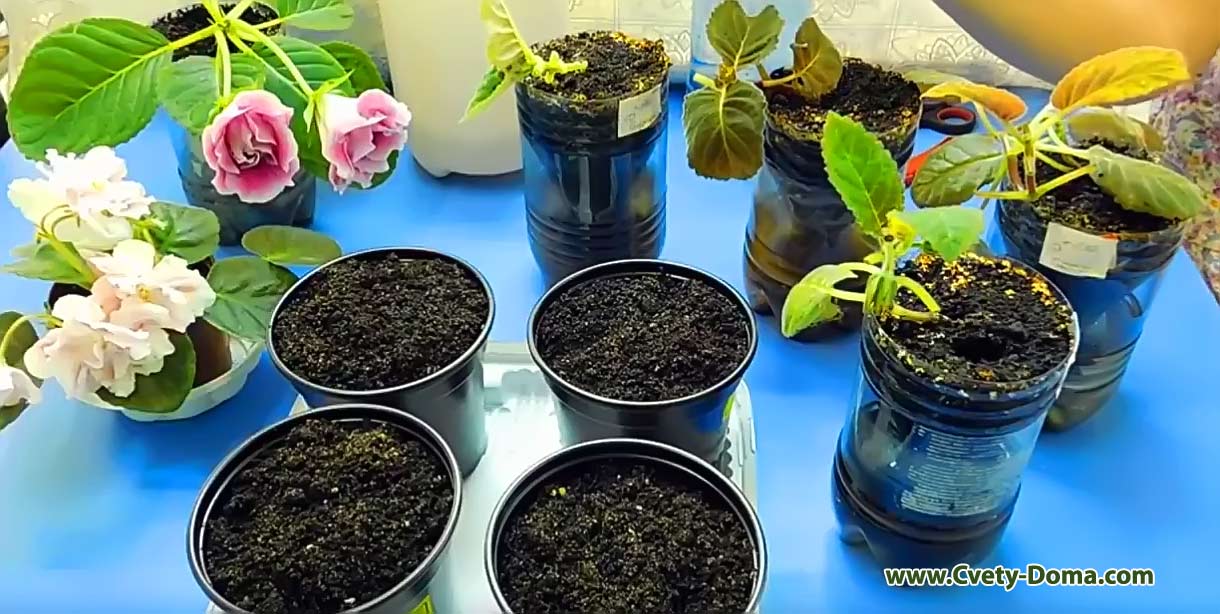
Another simple and affordable way to breed gloxinia, which I often use. In the spring, in April, you need to cut off the leaf at the base with a sharp blade. Stepchildren are also suitable for obtaining new plants. (usually this is the second sprout, from tuber), and apical cuttings (they can be cut at the level of the two lower leaves), who will delight with their first flowering after 5-6 months.
Cuttings root well in water. But I like to use peat or sphagnum moss better., which I put in plastic cups, filling them by about 2/3, and moisturize well. I immerse the handle in a small hole, I put it in the "greenhouse" – plastic bag with zip-lock – and put it on the windowsill.
After about 2 weeks on the cuttings roots begin to grow (on leafy cuttings, they often appear laterally), but it will take about a month to keep the plants in the "greenhouse". By this time, a new sprout usually appears next to the leaf., which I separate and transplant into a pot.
You can get "offspring" from the old leaf again. Even if its edges are a little wilted and dried, just cut them off and put the sheet back in the substrate. By the way, I do not change the substrate in the cup, reusing it.
YOUR SEEDS
When growing gloxinia from your seeds, you can get plants of amazing colors. In addition, this process is fascinating., it is very interesting to follow the birth of a new life.
To obtain seeds, plants with double flowers can be pollinated among themselves, varieties with simple flowers, as well as to pollinate terry with simple. Simple gloxinia, if they bloom in winter, can be pollinated even in the cold season, and terry – better
only in spring or summer. It is very important to choose the right moment for pollination - the stigma of the pistil (its upper extended part) should get sticky. This usually happens 5-6 days after the flower opens.. Around the same time in the anthers, which are located at the ends of the stamens, pollen ripens. If you do not want, for self-pollination to occur, then immediately after opening the flower, remove the stamens with tweezers.
For cross-pollination, you will need to transfer pollen from the anthers of one gloxinia to the stigma of the pistil of another. In this case, it is most convenient to use a clean brush.. After some time, a seed box forms on the peduncle. It will take about 8 weeks. When will you notice, that the box started to crack, carefully cut it from the peduncle and put it in a dark place. After about a week, the seeds will spill out.. Now you have to wait, when their color turns brown, and you can start sowing.
© Author: D. NIKOLAEVA Leningrad Region
GLOXINIA – QUESTIONS AND ANSWERS:
Gloxinia woke up in November. And before that they retired themselves (dried stems and leaves). She put the pots in a dark place, true, not quite cool, but there is no other. She didn't water. And they suddenly gave shoots! I read on the Internet, that you need to unscrew the sprouts and put the tubers to rest again, which I did. But is it right? Will they give shoots again on time? And what to do, if gloxinia wake up too early?
In gloxinia, like a plant with a pronounced dormant period, there is a stage, when no external conditions (apart from harsh artificial stimulation) unable to wake her.
The duration of natural sleep is approximately one and a half to two months, after which the tubers can start growing, if conditions (warm content, eg) contribute to this. Therefore, it is recommended to keep gloxinia cool. (+12-15 city.), which prevents them from coming out of dormancy too early, in the middle of winter. Usually good storage conditions - next to the balcony door on the floor, or for tubers freed from soil - in the refrigerator, in the vegetable compartment.
If gloxinia woke up in winter, when there is little natural light, it is better not to pick off young shoots, but put under the backlight, creating normal conditions for development with the help of an artificial lamp. Removal of sprouts, especially if the tuber is small, can severely weaken the plant and lead to death, but this will not extend the rest period in any way, gloxinia in the heat will still try to grow. If by the spring the shoots still stretch, then they are shortened, and the cut off tops can be used for breeding.
© Author: Natalia SEMENOVA, biologist, collector
GLOXINIA IS BEAUTIFUL
I store the tubers of my favorite gloxinia in bags with peat in a dark, cool place.. By February they wake up, means, time to plant in fresh soil.
I use a light substrate, based on high peat, sometimes I add leavening additives. I sprinkle the tubers with a layer in 2-4 cm.
I choose shallow pots, but wide, so that there is a distance from the edge to the tuber 4-5 cm.
I put it on the western or eastern windowsill. These are the perfect places. In the north it is necessary to illuminate, in the south - shade. Content temperature - +18-24 city.
I start feeding in 1, 5 months after planting with complex mineral fertilizer with a high content of phosphorus and potassium.
From planting to flowering takes about 4-6 months. Small tubers bloom faster.
IN THE PHOTO MY GLOXINIA
WHEN THERE ARE NO SPRINGS
If gloxinia does not wake up during February, checking the tuber. It doesn't have to be soft.. With a sharp knife, lightly cut the skin. Under it is a healthy "body" - light, like potatoes. Means, nodule is good, but sleeping. Then I plant it in the ground, I water with a solution of "Epin" or "NV-101", I cover with a package.
I plant the most “slow-thinkers” in a container with sphagnum moss: put in a recess in the form of a nest, which is pre-moistened with water. I put in a greenhouse in a bright place. The result is fast and 100 %. This method of awakening is also suitable for gloxinia., wintered in the ground.
AMPEL VARIANT OF GLOXINIA
Some varieties of gloxinia have a feature - to produce long peduncles. Then I take a planter without holes in the bottom (to prevent water from leaking onto the floor), pour drainage from expanded clay or foam chips, priming. I plant a baby or a tuber and hang it by the window.
© Author: Dmitry LOSEV, collector, r. Tver. Photo by the author. @garden_ wlosev
GLOXINIA OR BEAUTIFUL "WORKED" NATURE
Gloxinia – Photo
The first time I met gloxinia 3 years ago before Christmas. I liked her in a flower shop, and I decided to give myself a gift. This plant, that fall in love at first sight, and now I have a whole collection of "gramophones" skillfully painted by nature itself.
ASSORTED VARIETIES
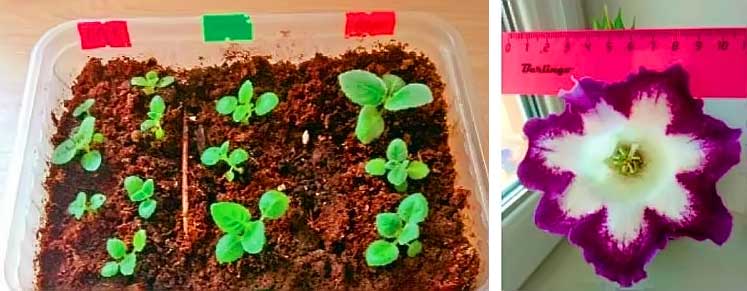
Gloxinia is easy to propagate from seeds.. I usually sow them in winter., towards the end of December.
I fill the cells for seedlings with flower soil, leaving to the top 4 cm. I spread the granules with seeds on the surface at a distance 1, 5-2 cm apart, sprinkle with earth 2-2, 5 cm, I cover with a film and put it on the eastern windowsill. Seedlings appear around the sixth day.
Everywhere they write, that germination needs light and it is not necessary to cover the seeds with soil or not at all, or slightly. But these options do not suit me., as the sprouts that have appeared are kept "by a thread". Tried to sprinkle on about 1 cm, but this result disappointed me: when watering with a small watering can with a thin neck, some seeds are exposed. But when they are deepened, the roots are well strengthened, seedlings grow compactly, with a developed leaf socket.
When seedlings grow 3-4 small leaflets, dive plants individually. Now the main thing is not to overdry and pour. I pour aquarium water into the pan - times 3 per month. The rest of the time - the usual separated room temperature. Once a week from April to September I spray the kids with "Zircon" or "Epin" (according to instructions).
First-years bloom in late July-August. From the seeds of different varieties, a whole assortment of gloxinia is obtained. I give them to my friends and acquaintances for any holiday..
Gloxinia – care
GLOXINIA CARE TIPS
The plant loves light, but moderate. It does not bloom well in the shade and may even lose its shade..
I shade from the sun, so that the "bells" do not wilt.
My beauties are growing +23-24 city. Can't handle sudden changes.
“I don’t water the bushes much, so that the roots do not rot. I pour water at room temperature into the pan, gloxinia takes the right amount, and drain the excess after a while. I regularly loosen the soil in the pot, carefully, so as not to damage the plant.
WINTER HOLIDAY FOR GLOXINIA
Reduce watering by fall, to prepare gloxinia for a dormant period (from mid-September to spring). I cut off the yellowed top layer of soil with a knife 2 see and change to fresh. Remove dry leaves. I never take tubers out of the pot., in dry soil I clean under the bath. I water a little once a week. After rest I get, I spill the substrate well and put the flowerpots on the windowsills of the east side. Bushes bloom from spring to autumn.
© Author: Nadezhda STEPANOVA, Voronezh region. Photo by the author
SECRETS OF COMPACT GLOXINIA
So that gloxinia does not stretch
What to do, if the plant is stretched? Most common answer: remove the stretched shoot. Advice is only good for those, that in this way we will get rid of the problematic escape - out of sight. And that's bad, that in return it will grow exactly the same. Therefore, it is necessary to determine the causes and find solutions..
REASONS FOR STRETCHING GLOXINIA
-
Heat
The optimal score is +22-25 city. Gloxinia can't stand the heat. No, she is able to live in such conditions, eg, teenagers, who gained green mass in the spring, feel great in summer and bloom beautifully. And here are those bushes, which initially grow in "hot" conditions, will start to stretch. What does it have to do with? At higher temperatures, the feeding process is faster, what you need, active saturation with nitrogen, with an excess of which intensive upward growth occurs.
-
Lack of lighting
The light must be diffused, no direct sunlight. With a lack of lighting, gloxinia must be illuminated.
-
Excess fertilizer
As in the case of temperature, nitrogen is needed by plants in the initial period of development. Don't Overdo Fertilizers, they are often unnecessary. I AM, eg, I don't feed my gloxinia at all., there is food in the ground, which is enough for them.
-
Hormonal disbalance
Seldom, but there is such a case. Plants also have a set of hormones., responsible for the life system. When any of the factors in growing conditions "falls out", one of the hormones stops working and is replaced by another. Means, it is necessary to follow agricultural practices.
-
Varietal feature
The matter is fixable. for example, varieties, that are prone to stretching, leave a few shoots or make a pinch for the growth of stepchildren. The bush becomes lush due to the large number of shoots.
TO DO NOT STRETCH GLOXINIA – SOLUTIONS
ON THE RACK
We focus on temperature first. (+22-25 city.) and lighting power (minimum for lamps - 18 W, I use Uniel lamps).
The higher the shelf, the warmer it is. Check with a thermometer, but don't forget, that the lamps are also warm. And not only air, but also a shelf, to which are attached. A humidifier will help lower the temperature.
И ПОДОКОННИКЕ
Here, gloxinia suffer more often from a lack of light and less often from temperature.. At the beginning of growth, it is better to illuminate them., and with increasing daylight hours, the lamp can be removed. In winter, lighting is a must, possibly, need heated floor mats.
Which orientation window to choose is hard to say, can only be determined by experience: arrange several gloxinias on different windowsills, and you will understand, where are the best plants.
© Author: Dmitry LOSEV, collector, r. Tver. Photo by the author
REPRODUCTION OF GLOXINIA BY SHEET – VIDEO

LANDING AND CARING FOR GLOXINIA – VIDEO


Is it possible to spray Saintpaulia and Gloxinia with vitamins and preparations - "starters"?
Plants with pubescent leaves, such as violets and gloxinia, it is undesirable to spray, since spots may remain on the leaf blades. Root dressings are enough for them.. If a young outlet is just gaining strength, feed with mixtures with a predominance of nitrogen (eg, Agricola for decorative) times in 2 weeks. Or at every watering - 1 d on 1 l of water. Always take half the dose indicated in the instructions. With an excess of fertilizer, stains may appear on the leaves of some varieties.. When flower stalks begin to form, the diet should be dominated by phosphorus.
Elena KANKOVA
Опыт укоренения листочков глоксинии был у меня давно, но захотелось вырастить красавицу из семян.
Посеяла смесь серии «Брокэд» в ноябре поверхностно на грунт «Тер-ра Вита». Для растворения гранул сбрызнула водой. Накрыла емкость пакетом и поставила на стеллаж под лампу. Всходы примерно через месяц пересадила в небольшие кассеты. Когда сформировалась хорошая розетка, рассадила в горшки с землей с дренажным слоем. В садовый грунт из-под крапивы добавила покупной и перегной.
Сколько же было радости, когда сеянцы порадовали махровыми цветками разной окраски!
CARE SECRETS
Стоят мои глоксинии на западном окне. Поливаю их теплой водой. I follow, чтобы почва в горшке была всегда влажной, но без излишка, иначе загниют корни. В период роста подкармливаю растения комплексным удобрением, а затем перехожу на монофосфат калия. После цветения к концу августа полив сокращаю, растение готовится к покою. Срезаю надземную часть и убираю горшки в шкаф, стоящий в теплом коридоре. Первогодок на зимовку не отправляла — стояли на подоконнике, с редким поливом.
3 совета для глоксинии
1. Чтобы глоксиния пышно и продолжительно цвела, подкармливаю ее в весенне-летний период 2 раза в месяц раствором дрожжей — 50 r (сырых) on 5 l of water, через час после основного полива.
2. Для профилактики болезней и вредителей готовлю настой чеснока: pour 8 зубчиков 2 л горячей воды на 20 minutes, а затем 1 st.l.. разбавляю в 1 л воды для полива.
3. Увлажняю глоксинию отстоянной (times in 7-10 дней — талой или дождевой) водой комнатной температуры, avoiding stagnant moisture. Стараюсь не попадать на бархатные листья, иначе на них могут появиться пятна, гниль. После аккуратно рыхлю грунт. Пыльс листочков осторожно убираю влажной кисточкой.
Два варианта зимовки глоксинии
Еще несколько лет назад у меня не получалось добиться ежегодного и обильного цветения глоксинии. Сейчас уверена, что для этого крайне важно обеспечить ей оптимальные условия зимовки. Здесь есть два варианта.
1. В ГОРШКЕ
Когда после цветения листья желтеют, глоксиния собирается отдыхать — прекращаю полив и подкормки. Дожидаюсь усыхания зеленой массы и аккуратно ее удаляю. Досыпаю в емкость с растением песка так, чтобы не осталось пустот, и накрываю крышкой. Ставлю горшоквтемный угол, где температура зимой не поднимается выше +12 city. Поливаю не чаще одного раза в месяц. Слежу за тем, чтобы раньше времени не появились новые ростки. Если глоксиния начнет просыпаться, убираю ее в более прохладное место.
2. ВНЕ ЕМКОСТИ
После усыхания листвы глоксинию выкапываю, clearing the earth, удаляю сухие корешки. Пару дней просушиваю клубень и помещаю в полиэтиленовый пакет вместе с субстратом из грунта и вермикулита. Закрываю и убираю в холодильник в отделение для овощей. В конце зимы перекладываю в теплое место, чтобы клубень проснулся. А позже сажаю в горшок, постепенно начинаю поливать и подкармливать.
Глоксиния после отдыха
Мои глоксинии зимуют в горшках в прохладном подвале. Земляной ком слегка увлажняю, чтобы не допустить пересушки клубней. В середине февраля, когда появляются первые росточки, пересаживаю растения в свежую, loose, легкую и питательную почву. Поливаю умеренно в поддон. Ставлю на светлый подоконник.
Моей глоксинии 7-8 years old. Пробовала укоренить от нее лист — не получилось. За все годы дала только одну детку, которая пока не цвела. Сейчас клубень отдыхает, а сколько лет он вообще может жить?
У вас взрослый клубень, и понятно, что для перестраховки вы хотите сохранить сорт из листьев. Но почему не получается укоренить черенки, трудно сказать. Все зависит от условий и содержания.
ЧТО НУЖНО ЧЕРЕНКАМ
1. Субстрат с нейтральной реакцией: вода, perlite, vermiculite, coco substrate, sphagnum moss (at choice).
2. Temperature for rooting - +22-27 city.
3. Яркий рассеянный свет, с защитой от прямого солнца.
4. Greenhouse, чтобы обеспечить 100% air humidity.
СКОЛЬКО ЖИВЕТ
I have, eg, есть клубень, которому уже 9-й год. А бытует мнение, что живут они и по 15 years old.
Однако те, кто так говорит, упускают тот момент, что со временем основной клубень мог отмереть, и глоксиния нарастила замещающий. therefore, если растение здоровое и ежегодно цветет, пусть и дальше вас радует. Лишь советую снова попробовать укоренить с него листья, учтя все требования, приведенные выше.
Dmitry LOSEV